

Products Used:
-Barry M Base Coat, Top Coat & Nail Strengthener
-Barry M Bright Red Nail Paint (262)
-1 teabag (mine happened to be of the PG Tips pyramid variety ;)
-Scissors
Last night whilst filing my nails I noticed a tiny little nick in the side of my thumbnail, thought nothing of it, went to bed and went about my business today. Then later today I noticed the little nick had turned into a full on split. It's pretty low down meaning I'd have to trim my nail down very short to get rid of it and avoid further splitting.
I've seen a few videos about using a teabag to help strengthen the split, allowing you to grow it out - as I'm trying to grow my nails I thought I'd give it a go. I'm estimating it's going to be about 2 weeks for the split to grow out at the rate my nails grow so I'm going to do a follow-up blog. I don't mind repeatedly applying a little square of teabag every time I re-paint my nails if it means I'm not going to have to trim it down.

The split in question - complete with arrows to point out the dreadfulness of it all! ;)
Please ignore how the second image makes my cuticles look like death - I can assure you they're happy and moisturised in reality.
Firstly I washed my hands of course, then cut a piece of teabag this size:

Then applied some clear nail polish to the area I was going to be applying it to, and placed the tea bag square right up to the edge of the split ensuring it covered it completely:

The bottom half of the tea bag wasn't stuck on fully – at this point I was thinking there's no way I'm walking around with a huge white hunk of tea bag stuck to my finger like an idiot. A bit more clear nail polish to attach it fully soon sorted it out however.
I applied a generous top coat of clear polish and to my delight the square became invisible and smooth:


(Super close up with the light reflecting off it - I'm sure if you were looking at it ridiculously close or with a magnifying glass it would be slightly noticable but I think you can get away with just clear polish.)
To cheer myself up I whipped out my favourite red polish (Barry M Bright Red nail paint).

This is 2 coats + topcoat - no visible tea bag at all. The consistency of the polish is more of a jelly red than a creme.
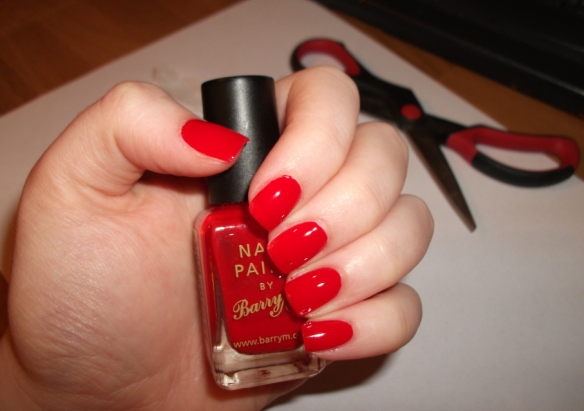
(click to enlarge)
And voila! A full set of happy red nails, which completes the 'Tea Bag Method' application and NOTD :)
I'll update on the end result.
-LadyDanger
xxx
Omg wow! I shall try this in future! Thanks for posting :) xx
ReplyDeleteHehe no problem ;) I don't know why I haven't tried it before now! x
ReplyDeleteOhmigosh! I have got to try this. This is awesome! My nails always break :( Thanks so much for posting this!
ReplyDeleteThis was very useful, I didn't hear of that method before..or maybe I just didn't understand it :P but it looks very easy :)Thank you for showing it so detailed!
ReplyDeleteWOW! that is an awesome trip.
ReplyDeletethanks for sharing!
I probably should have tried this 2 weeks ago when I developed a tear halfway (literally halfway :|) down my thumbnail!
ReplyDeleteThat Barry M polish is STUNNING by the way, it's so vibrant!
This is such a clever idea and it works so well! I really should have done this the other day when i got a split but i was too lazy and just cut it short, which meant i had to cut all my other nails short :/ Gorgeous polish too!
ReplyDeleteI used to do this until I start my nail course and got my fibreglass mesh which is what I now use though. Teabags are another good idea. ;)
ReplyDeleteThat color is beautiful! :-)
ReplyDeleteGreat tip! I wish I had heard about this before, I always get really bad splits in my nails as I'm very clumsy.
ReplyDeletep.s. the lipsticks arrived this morning, thanks so much for posting so quickly. Now trying to decide which one to wear tonight!
Ellie x
NIce tip! I wonder if this will last! I usually just use a nailglue for 2 weeks, which works most of the time.
ReplyDeletecool!!!
ReplyDeleteAmazing! I usually have the same problem and I always finished cutting my nails. That solution is great :D
ReplyDelete